|
|
 |
X3 Custom LCD Installation |
 |
X3 Custom LCD InstallationPublished by  KingArthur on 2006-08-31 KingArthur on 2006-08-31
Category: Xecuter3 | Page Views: 18,438
Here's a tutorial for anyone who wants to connect an LCD screen to their X3 CE other than the X3LCD that you can purchase. You can use any LCD screen that uses an HD44780 standard controller. For this tutorial I used a Crystalfontz CFAH2002A-RMI-JP 20x2 Red LCD, and a Crystalfontz CFAH2004A-RMI-JP 20x4 Red LCD. So one is 20 characters x 2 lines and the other is 20 characters x 4 lines. Found both for about $15ea on ebay. This tutorial is not very technically complex, but you will need very good soldering skills to successfully solder the small connections required.
Required Tools/Items you will need:
- 1 HD44780 compliant LCD screen of your choice (I am not sure if other types of LCDs will work)
- 1 X3 or X3 CE mod chip installed on your xbox
- 16 strands of small wire (I used and old ide cable and cut off 16 to keep them all attached)
- small soldering iron (15watt would be best, but its possible w/ a 30watt)
- rosin core solder
- multimeter
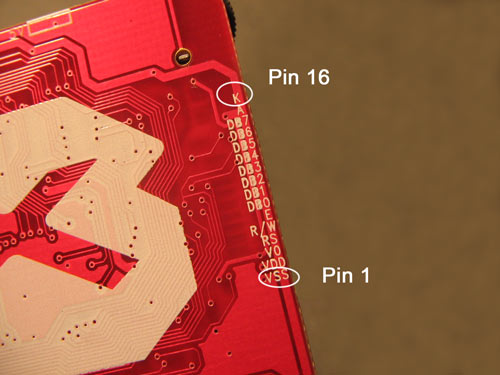
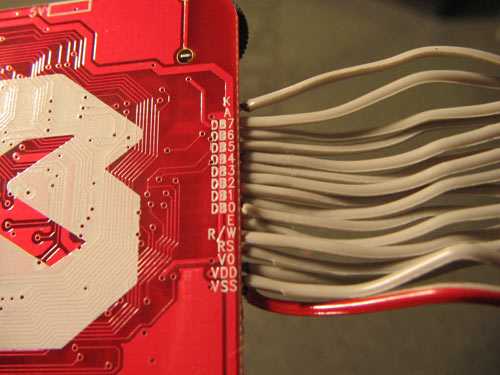
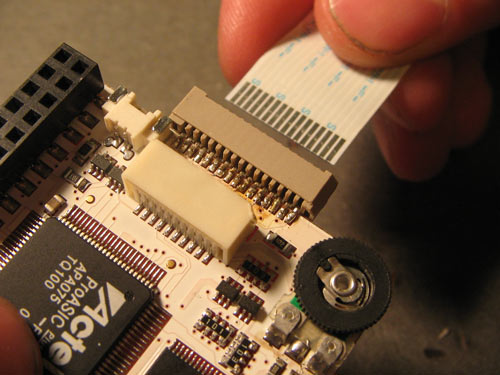
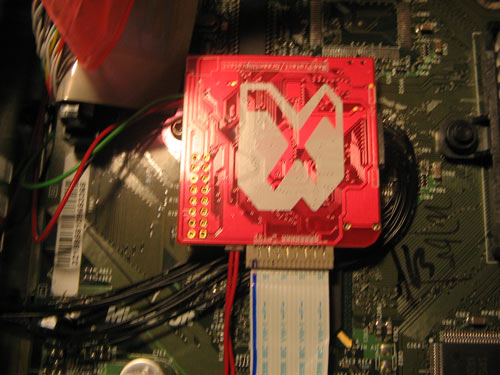
First you need to locate the 16 LCD solder pads on your X3. They are on the white side of the chip along the edge, between the LCD contrast potentiometer (the round plastic wheel), and the LPC header port. They are clearly labled by function on the other side of the chip. Vss is pin 1 as I have labeled in this photo.
Then you have to match these 16 pins to those on your LCD module. The two LCD modules that I used were not labeled by function, but rather just by pin number.
So all we have to do is look at the specs for the LCD module to determine which pin is which. The datasheet was readily availible off Crystalfontz Homepage. And lucky for me the pins match up perfectly to those on the X3 so I didn't need to switch any leads around. Easy.

Ok so now we get to soldering them together with our 16 pin ide cable. The soldering works easiest if you briefly heat up the pads on the X3 one at a time, putting just a tiny bit of solder on each pad. Make sure you don't short two pads together! Then do the same to the tips of each wire, putting a small amout of solder on each one. Then all you have to do is hold the wire in place on the pad and touch the iron to melt them together. This is a really small space to work with on the X3 so you must be really careful that you dont short two wires or pads together. Even though I was able to solder the wires in place, as you can tell from the next two pics, it is very cramped.
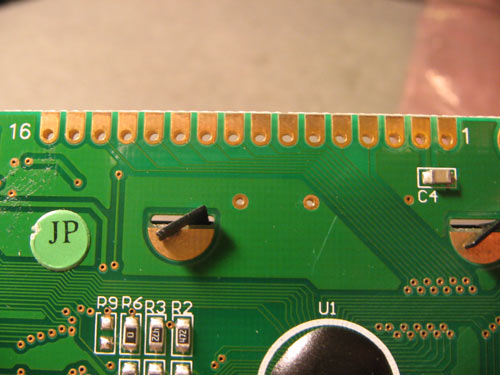
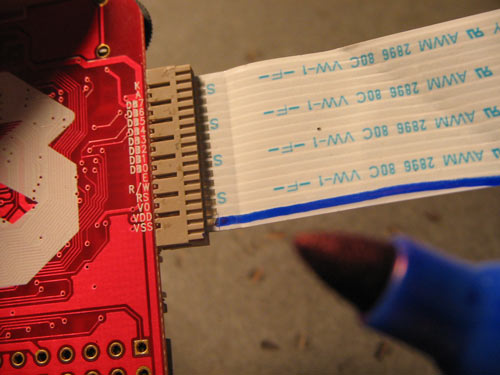
I did find an alternative that was slightly easier to solder and gives the ability to unplug the cable, like the original X3LCD and all the other connections to the X3 can be unplugged. It turns out that inside a busted samsung dvd drive I found a 16 pin flat cable with a connector at each end. You will need to desolder the connectors from the board to use them. Use a desoldering braid for this. One of the connectors, (the one that lies flat) lines up perfectly with the 16 pins on the X3! Haha Sweet! So I will solder this to the X3 instead of wiring directly. Here's a picture.
Note: It works just fine to solder directly to the X3, you don't need to use this DVD connector. I am mainly using it to keep everything able to be disconnected for the overall outcome of this xbox project which will end up in my car. You can find these same cables and connectors on any cd/dvd player although they may not fit perfectly to the X3 or have the same number of pins.
Anyway, after soldering I test for continuity with a mulimeter to make sure it is soldered properly and nothing is shorted out.

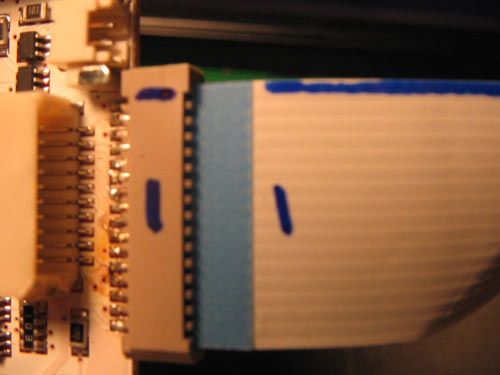
Next I need to mark pin 1 on the cable since it has no markings of its own(like the red wire on the ide cable).
This cable can also be plugged in backwards so I also make a mark on the top and a matching mark on the connector so I wont be able to forget the orientation of the cable and plug it in wrong.
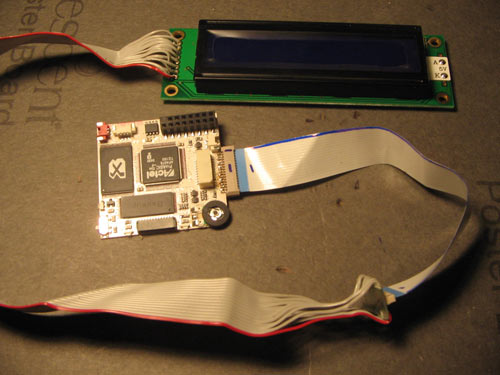
Now I just need to solder the ide cable to the other connector and to the LCD screen, making sure all 16 pins match up. Here's a picture of the X3 connected to the 20x2 LCD screen.
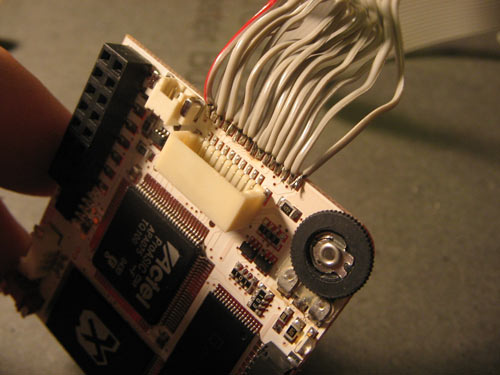
Now just plug in all the X3 connectors back in.

And reinstall the X3 into your Xbox.
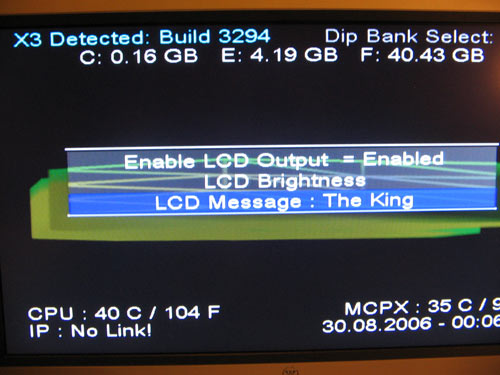
Boot up your Xbox to X3 Config Live and make sure the LCD output is enabled. You can also adjust the brightness from here as well as the Start Up message.
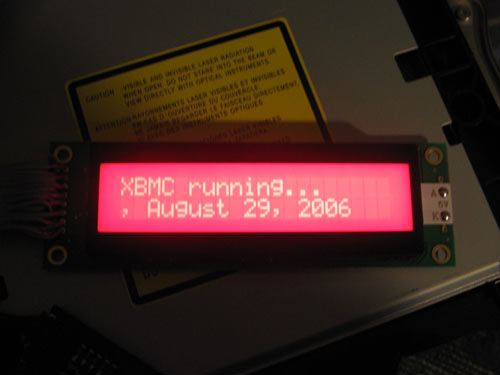
Here's the 20x4 LCD connected.
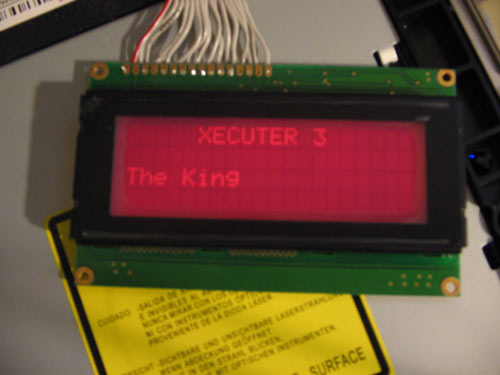
Some more 20x4 screenshots...
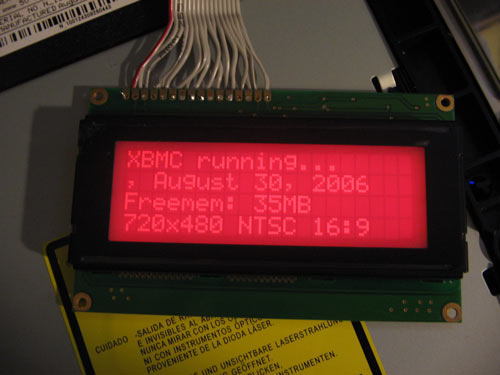
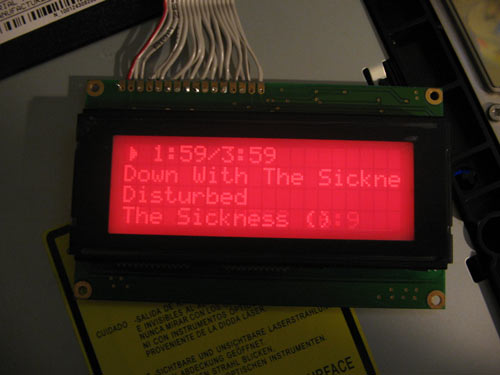
Here's the 20x2 connected. Both screens look the same brighness by the way, and both are red, not pink. Just different camera settings.

Thats all there is to it. I wont go into mounting the LCD in the xbox because I wont be doing that for this project and there are tutorials for that already. Although with a dremel and some creativity that shouldn't pose too much of a challenge.
Enjoy Your Custom LCD!
|
|
|
Browse Tutorials |
|
| |

 | Latest News | |
| Popular Xbox Games | |
 Aeon Flux Aeon Flux
 Page Views: 456,329 Page Views: 456,329
Aeon Flux is an action-packed game that combines speed stealth with acrobatic combat. The game bridges the fever-dream essence of the animated TV series with the mass-market appeal of the upcoming fea.. |  | | More Xbox Games |
| |