|
|
 |
SmartXX V2 Quicksolder Install 1.0-1.5 Version Mobo's |
 |
SmartXX V2 Quicksolder Install 1.0-1.5 Version Mobo'sPublished by  Jeff McCloy on 2004-02-26 Jeff McCloy on 2004-02-26
Category: XBOX | Page Views: 7,692
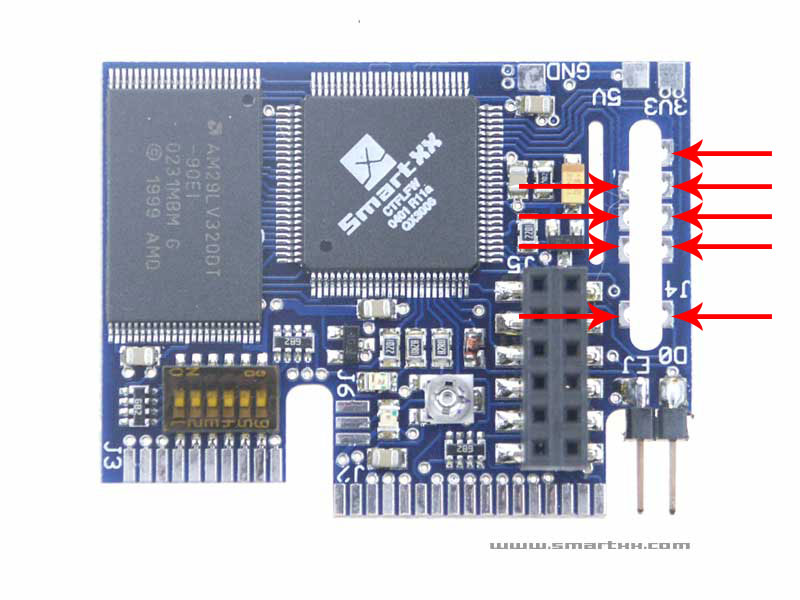
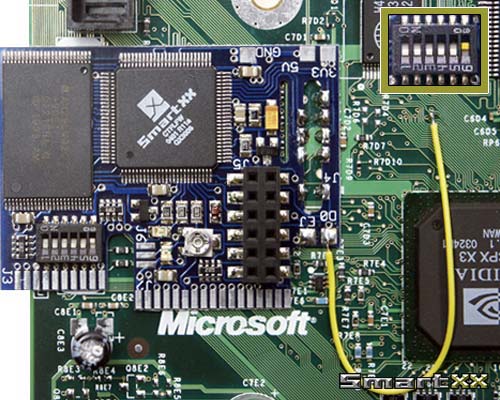
Align the SmartXX with your mainboard as shown in the image below. (Ignore the blue wire connecting to the SmartXX for now.)
The row of capasitors next to the LPC should fit nicly inside the cutout on the SmartXX chip
You need to solder each of the SmartXX solder pads (arrowed) to the LPC on the mainboard.
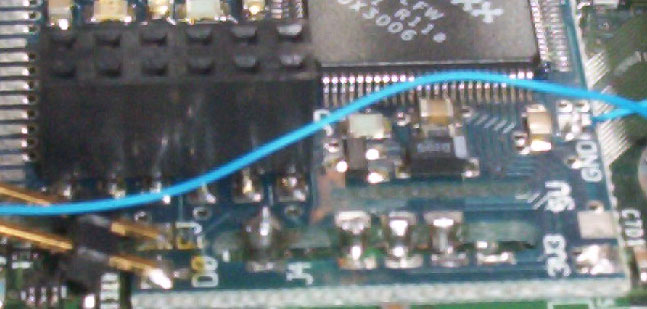
Hold your soldering iron near the the join between the SmartXX and the LPC. Allow enough solder to run into the LPC to fill the hole and stay on the SmartXX solder pad.
How the joints should look. (Sorry for the image quality.
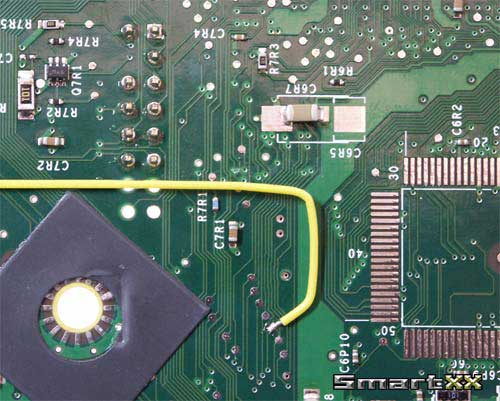
Turn your mainboard upside down. Locate the point the wire is soldered to and solder your D0 wire to it. (Make sure your wire is long enough to reach the D0 pad on the SmartXX.) Run your D0 wire through the screw hole in the image.
Turn your mainboard rightside up again. Solder the other end of your D0 wire to the D0 pad.
(some SmartXX have pins on the D0/EJ pads, just solder the wire to that instead.) Turn Dip switch 6 on.
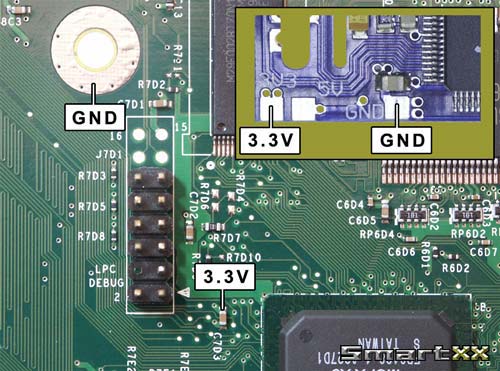
ONLY FOR V1.5 MAINBOARDS
The version 1.5 has no GND or 3.3V on the LPC-Port Connect the 3.3V & GND of the SmartXX to the relevant points on the mainboard.
Re-build your XBox in reverse order from what you did earlier. Your all done. Don't put the screw in the hole with the D0 wire going through it!
Make sure you reconnect the FAN wire.
|
|
|
Browse Tutorials |
|
| |

 | Latest News | |
| Popular Xbox Games | |
 Grooverider Slot Car Thunder Grooverider Slot Car Thunder
 Page Views: 278,625 Page Views: 278,625
Grooverider: Slot Car Thunder brings the nostalgia and excitement of slot car racing to consoles for the first time. With 20 tracks in 5 environments, Grooverider: Slot Car Thunder offers plenty of ac.. |  | | More Xbox Games |
| |