|
|
 |
Move your Controller Ports |
 |
Move your Controller PortsPublished by  halouser on 2005-06-19 halouser on 2005-06-19
Category: Hardware Mods/Addons | Page Views: 5,383
Supplies Required:
- cutting tool (dremel prefferably)
- epoxy resin
- bondo and spot putty
- steady hand is optional
- soldering iron/solder
- aprox. 40" of 26-30awg wire
* this was done to an xbox with a dvd drive in the opposite position of a stock xbox. take the steps necessary to make this tutorial match the needs of your xbox.
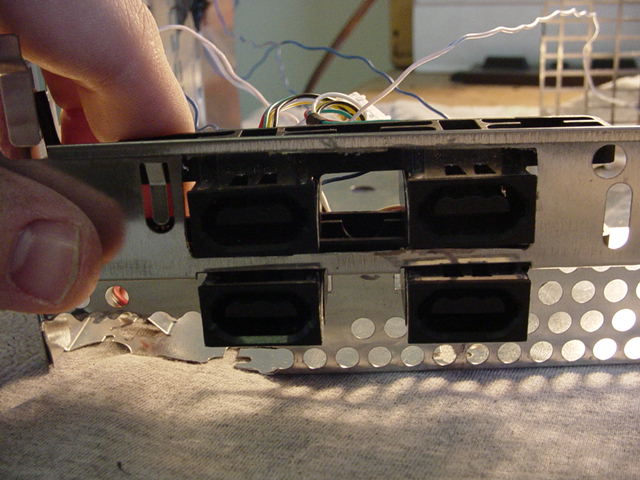
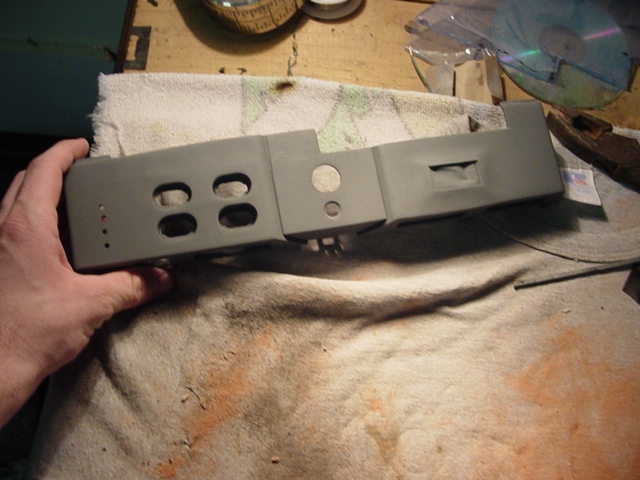
1. first you want to cut the metal sheilding so that your controller ports can rest on top of eachother. i just tacked the ports together with hotglue and eyeballed.
2.now that the ports are in position you need to get a measurement of the distance between them so that you will know how big of a perimeter to create around the controller ports on the control panel.
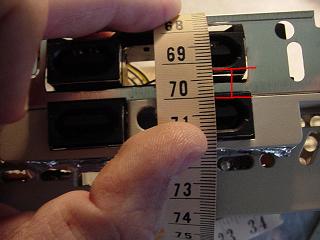
YOU WILL WANT THESE TWO DISTANCES TO BE THE SAME.

3. in this step you will need to make the measurement around the perimeter of the ports that will be cut out. if you just glue the actual controller ports directly together it will be aprox. 10mm. measure for youself to be safe though.


4.This is the back of the port after being cut from the control panel. when you move this portion of the cp to the other side you are going to have to flip it 180 degrees so that the deeper port will match with the existing one.

5. Now, you want to take the ports and tack the corners with hotglue. you can get a test fit now, and make any adjustments. after the ports and control panel are lined up correctly. mix some epoxy, and cover the back cracks. its a good idea to take the portion you removed from above the 3 and 4 ports and move it to the hole where the 1 and 2 ports used to be. epoxy that into place as well.
6. You are going to want to let the epoxy dry for several hours before moving on to this step. the supplies that will be needed are bodo and spot putty. you can pic both up, as well as the epoxy, at your local walmart or home improvement center.
 bondo
bondo
 spot putty
Mix up some bodo and spread it over the cracks in the front of the control panel. this part can get messy, but its ok because it will be sanded flush.
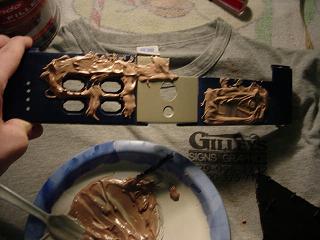
As you can see, i used a plastic knife to apply my bondo for this project, but i have since purchased a small putty knife and it works wonders. (the smoother the bondo the less work sanding)
7. I usually let the bondo sit at least over night. at any rate, when your bondo is dry, sand it flus with the control panel. should look something like this.

Now take your spot putty and apply a thin layer over everything that has bondo in it. the putty is to fill in all the air bubbles made by the mixing process, and to also ensure that the joints where the bondo and plastic meet are smooth. again you can apply this with your finger or a putty knife. after this dries (usually takes a couple of hours) sand smooth.
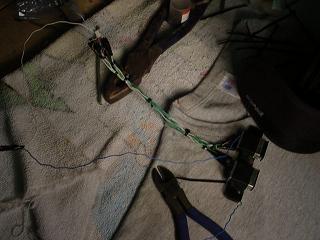
8. Now you need to prepare the actual controller ports for their relocation. its a straight foward process. take each wire, cut it in the middle, then extend it about 5 inches or so. the plug must reach its connection on the mobo for the ports to work (obviously). should look something like this.
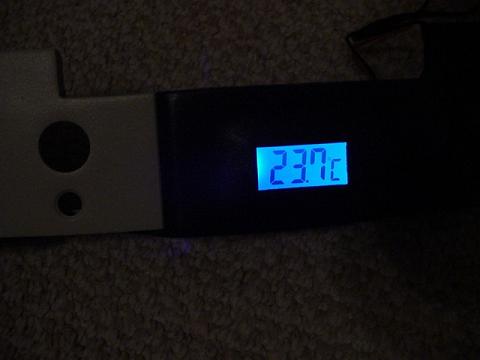
9. Finally, prime and paint your work. most of the time controller ports are moved to make room for some sort of lcd display on the front panel. for the purpose of this mod a digital thermometer was used to get an idea of the temp inside of a v1.6 box. finally, enjoy your work, you've earned it.
Tutorial Written by: HaloUser (-justin-)
Related URL: Xbox-HQ Forum Topic |
|
|
Browse Tutorials |
|
| |

 | Latest News | |
| Popular Xbox Games | |
 Cabela's Dangerous Hunts 2 Cabela's Dangerous Hunts 2
 Page Views: 374,942 Page Views: 374,942
Cabela's Dangerous Hunts 2 delivers intense hunting action in exotic locations throughout the world. You'll soon realize first-hand what every hunter fears most in terrifying "Kill or Be Killed" hunti.. |  | | More Xbox Games |
| |